Sunday, May 20, 2012
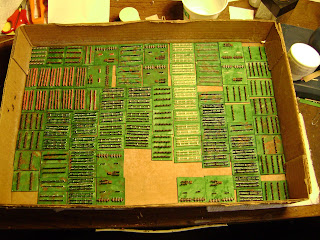
Game proofed Dogfight cards
Ink Jet all in one printer (to make copies of the original "Dogfight" cards), glue stick, 4 X 6 index cards, old Star Trek:the Next Generation surplus cards, card protectors and some time and we now have basic game proofed cards.
Tuesday, May 15, 2012
5 Hair roller Napoleonic armies in a tray Fini
A bunch of these rubber hair rollers (above) became this (below)
For several weeks I have been scouring flea markets and yard sales for these old rubber hair rollers (as well as old games) in order to complete my 5 Napoleonic armies (French, British, Russians, Prussians and Austrians) with no success. So I decided to scrub down some of my original hair roller DBA armies (specifically the 2 Hoplite armies, which I had duplicated with needlepoint plastic mesh ) to make enough stands to complete this project.
I learned a lot and I will NOT make any more hair roller armies (2mm scale). I have become a bigger fan of making armies from Needlepoint Plastic Mesh or "Granny Grate". Quicker and easier to make with either #7 or #10 plastic mesh. And, the material is easily obtained.
In the coming months, expect more pictures of these armies on the gaming table.
Sunday, May 13, 2012
Mother's Day 1918
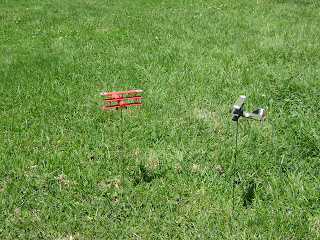
A Sopwith Camel meets up with a Fokker D7 on Mother's Day 1918.
Two opposing Tri's dance their dance.
Friday, May 11, 2012
"The British Bulldogs Watching at the Door"
Thanks to the inspiration of Ken Van Pelt at the Penny Whistle, we are ready to fly a dawn patrol on Memorial Day.
For your listening enjoyment: "The British Bulldogs Watching at the Door"
Thursday, May 10, 2012
Wednesday, May 9, 2012
Nieuport Tri
I tend to leave the hardest for last. So the last to be constructed and primed (though it will remain white with a light gray camouflage) was the cantilevered Nieuport Triplane. Yikes, this was deconstructed more times than I care to think about. The other Tris were a bear, as was getting the Fokker tails decent looking, but this plane was the worst.
Of course, upon announcing the construction phase was finally over, my dear wife reminded me that I hadn't done a Russian plane. So the last plane done was actually a Nieuport with the gun over the top wing. Comrade Krebikov flies again.
Curse you Ken Van Pelt. We will meet someday at dawn over the Western Front.
Monday, May 7, 2012
Quick Progress Report
Not much time, so I'll let "the pictures tell a thousand words". Boy do these things soak up the paint.
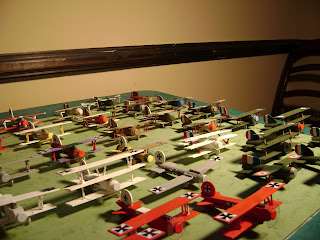
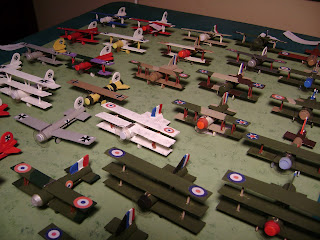
Lower left a Fokker 8 (bumblebee, single wing) at 2 o'clock the gray Eindecker ("so I can shoot through that propeller ?" with a German accent). My favorites on the right are the Black Maria (triplane with black nose) and in front of it the Black Prince (Sopwith Camel). "Thank you Canada". Looking for a mini Snoopy figure to pilot the Sopwith Camel with the Red Nose. Still printing out markings and insignias... pass the glue stick.
"Curse you Ken Van Pelt"
Labels:
clothes pin airplanes,
WW I aircraft,
WW I airplanes
Saturday, May 5, 2012
Clothes pin Air Force
When life brings you rain, use your clothes pins to make WW I planes. About time I came up with my own inspirational quote. Inspired by Kenneth Van Pelt at the Penny Whistle, I decided to design and make my own WW I planes. An heirloom for my grandson, Eric (I'm sure he wouldn't mind me playing with them for a few more years).
Now for some technical clothes pin jargon. First on the left is a square "No roll clothespins" available at most craft stores. Next is a "doll pin" also available at most craft stores. Next is what I call a button clothes pin (semi-old fashion model) found in our clothes pin bag (or on the internet). Finally on the right is the classic old fashioned clothes pin, also from our clothes pin bag (more expensive but found on internet).
Now cut the heads off the "dolls head", button (only used for my version of the Eindecker), and classic (far right) clothes pins. The classic is used primarily for making the German Albatross. The square works for the S.E. 5A, the Fokker D7 and other square nosed planes. The headless "doll pins" works on most other planes, such as the Triplanes, Sopwiths and some Nieuports. For an excellent guide to all WW I aircraft check out here . Also "Image Googling" any aircraft by name will get a wide variety of images.
Some Jumbo Wood sticks, mixed circles, and dowels and a glue gun (all available at most craft stores) and Voila.
Now where did I put my paint brushes ? Stoke up the printer we need some plane markings.
Tuesday, May 1, 2012
Meet the Alans
Alan Blades (not a Porn Star) above with multicolored shields.
Alan Cavalry, above. Knights & Light Horse
Alan Light Horse, above.
Finishing up my "Barbarian" armies for a planned Barbarian playoff. Shields are made with 1/16th paper punch and multiple colored card stock. Cheaper way to make those "curiosity" DBA armies than using lead miniature.
Alan Cavalry, above. Knights & Light Horse
Alan Light Horse, above.
Finishing up my "Barbarian" armies for a planned Barbarian playoff. Shields are made with 1/16th paper punch and multiple colored card stock. Cheaper way to make those "curiosity" DBA armies than using lead miniature.
Friday, April 27, 2012
Needlepoint Plastic Mesh (Granny Grate) how to
Making needlepoint plastic mesh (Granny Grate) armies. Buy a sheet of either #10 (smallest) or #7 (bottom 3 strips above) needlepoint plastic mesh. Using an exacto knife make the appropriate cuts in the plastic mesh. Horses are done with the Van Pelt cut which can be found here. I use a modified Van Pelt cut, leaving the horses connected to speed painting.
Infantry are simple vertical cuts. Top half of infantry painted with coat colors or flesh and bottom half are pants color or flesh. Yes, your Picts and Gauls can be their naked selves without offending anyone. Top of plastic infantry peg is painted an appropriate helmet/hat color. Part of the fun is figuring out a simple paint scheme, and painting is fast. I use craft paint, prefer Ceramcoat (if I can find) or Apple Barrel or you could try No Paint Armies with Granny Grate.
Round shields are made with 1/8" paper punch for #7 mesh and 1/16" paper punch for #10 mesh. These paper punches are available at Michaels, use your discount coupons to reduce cost further.
Making rectangular shields. Tiny scissors and marking off card stock piece at between 1/8" & 1/16" (for #7) then cutting strips length-wise, guesstimate the cross cut. Some shields are closer to square, but work. Dot of glue on plastic & dot of glue on small pot sticker, pick up card stock, flip and attach. By the last couple it's an easy routine. The cutting is easier because you can make so many, fast. Discard or trim the excess cardstock.
I mount my completed strips on balsa (I use DBA and DBA-HX standards for 15mms, but minimum stand size is 20mm, 15mm stands are just too full ) with Aleene's Quick drying Tacky Glue and balancing them for a minute with a small pot sticker.
I use 4" X 6" photo storage boxes (also found at Michaels) to store armies. Since they are so light, you can double stack them inside boxes.
Please look at previous entries. Clicking on photos enlarges them, so you can determine the patterns I used for mounting them on bases. Any questions, just ask.
Thursday, April 26, 2012
NKE & Hittites from #7 Needlepoint plastic mesh
Overall view with Hittites on left and New Kingdom Egyptians on right (above).
Hittite spears with shields and Psiloi and Horde.
New Kingdom Egyptians with archers in rear.
Wednesday, April 18, 2012
Comparing the size of Needlecraft Plastic Mesh armies
On the left with the red shields are the Late Eastern Romans done with #10 Needlecraft Plastic Mesh. On the right are the Early Hoplite Spartans with the black shields, using #7 Needlecraft Plastic Mesh.. The red shields were done with a 1/16 paper punch & card stock. The black shields were done with a 1/8 paper punch. Placing of shields is accomplished with the smallest pot stickers I had. An interesting technique to pick up, flip and place.
I know the Romans should have rectangular shields, but I was unable to cut out that shape, that small and opted for the round paper punch approach. Though, I'm experimenting with excess strips from the plastic mesh.
Time to clean up the armies with spot painting, shields, flags and dullcote-ing.
Monday, April 16, 2012
Early Hoplites 2 different scales & techniques
left to right. Spartan Hair roller army, Plastic mesh #7 Spartan army, Athenian Plastic Mesh #7 army, Hair roller Athenians.
1/8 inch paper punch and card stock provides shields for the #7 Plastic mesh Athenians on the left. Original hair roller Athenians on right.
Psiloi to the front. #7 Plastic mesh on left, hair roller Athenians on right.
Spartan Hordes to the forefront. Hair roller Spartans on left, #7 Plastic mesh on right.
Scale comparison. Left original hair roller army (2 or 3mm ?), middle is #7 Needlecraft plastic mesh with cardstock shields (6mm ?), 15mm Marian Romans on the right.
Sunday, April 15, 2012
3 Plastic Needlecraft Mesh armies
Used up the remaining spare horses to make a Mongol army (above, right). On left is Late Eastern Romans. In middle is Attila's army. Other photos follow.
Attila's Huns (above)
Late Eastern Romans
Mongols
Mongol Cav
The most fun of all is the storage of 3 DBA armies in 4" X 6" photo boxes.
Thursday, April 12, 2012
Attila's army & Eastern Romans from spare Plastic Needlepoint Mesh
Using the spare horses from my failed initial hair roller army effort (the scale was wrong), I decided to use additional scraps of #10 plastic needlepoint mesh and make the DBA armies for Attila and the Eastern Romans. These armies are my first made completely with Plastic Needlepoint Mesh sheets. Now all we need is a name for these type armies. Hair roller armies no longer apply.
Wednesday, April 11, 2012
5 Armies in a tray
Hopefully, enough space left for the Austrian & Prussian line troops (the Landwehrs are finished) after I find 6 more of the rubber hair rollers (I hope).
Monday, April 9, 2012
Saturday, April 7, 2012
Friday, April 6, 2012
Progress ?
Still learning about this technique. This scale (3mm) also makes it harder to suitably photograph these armies. The cavalry and infantry are painted and mounted for the 3 Armies (Russian, British, and French). I have spent several hours trying to figure out an easy way to make artillery with little succes so far.
What started as an effort to make armies quickly and easily has ended up being a bigger challenge than I anticipated. My eyes, hands and fingers just don't work well enough any more to tackle this type of project. But, I will push on to make 6 artillery stands and finish up the 3 Napoleonic Armies. And anticipate finding 10 suitable rollers to do the Austrian and Prussians.
Trying to figure out this Aleene's Quick Dry Tacky Glue has been an experience. Not as easy to glue one's fingers together as "crazy glue", but has caused bowed bases and trying to balance the PMS (Plastic Mesh Sheets) horses is a real patience tester.
Subscribe to:
Posts (Atom)


.JPG)
.JPG)
.JPG)